Goals:
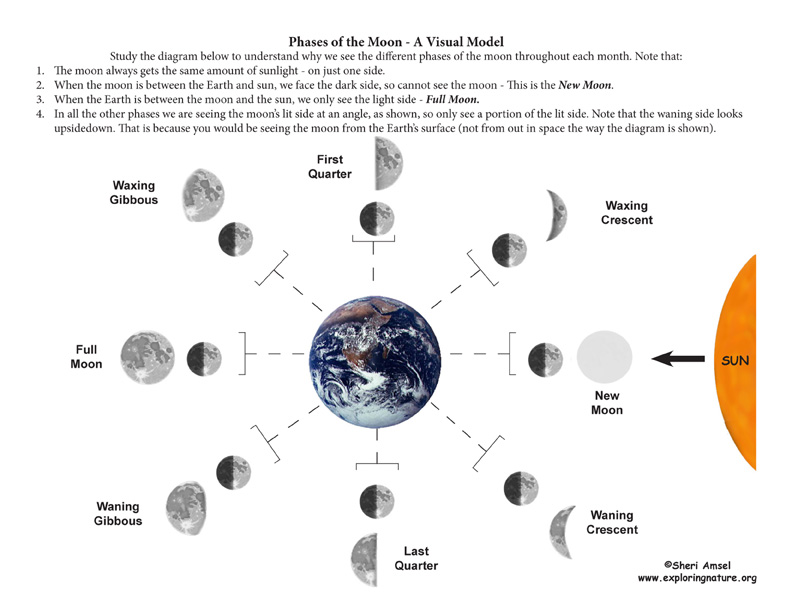
Learn about the phases of the moon by using a model to “act out” the movement of the moon around the Earth, as the Earth circles the sun and how our view of the lighted areas of the moon (the phases as such) changes.
Materials:
Procedures:
1. Clear floor space and put the lamp in the middle of the room. It represents the sun.
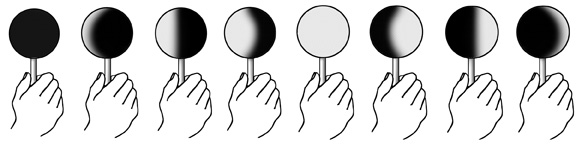
2. Each student will need to carefully spear the styrofoam ball with their pencil in the center until it is secure on the pencil. This “styrofoam lollipop” represents the moon. Each student represents the Earth.
3. Turn out the lights and cover the windows. This activity works best in full darkness.
4. Each student should hold the moon (by the pencil) in one hand. Students should spread out in a circle around the light giving themselves enough room to rotate 360° without bumping into other students. They will be rotating (as Earth does) and the moon with them. As the moon changes position in relation to the sun (the lamp), they will see different amounts of the styrofoam ball (moon) just like the phases of the moon. Here goes.
5. Start facing the light with your “moon” held out in front of you (between you and the light). How much of the moon is visible in this position? This is the “new moon” position and the side facing the Earth (you) should be dark.
6. Next, keeping your arm extended, rotate to the left (counterclockwise) 45° watching your moon. Notice that you can now see some of the white showing on your moon. You are in the waxing crescent moon phase.
7. Rotate again to the 90° position from the light (your side will be facing the light).
Notice there is now more of your moon in light (about half). This is the first quarter moon phase.
8. Another rotation to brings you to a 3/4 moon or waxing gibbous moon.
9. With your back to the light you should see all of your moon now. This is a full moon.
10. If you keep rotating in the same direction with will next see the waning gibbous phase.
11. Then the last quarter phase.
12. Then the waning crescent phase.
13. With your next turn you should be facing the light again with a new moon.
Now you have “acted out” a full month of moon phases and can see how the moon always gets the same amount of sun, but we see it from different angles as it circles the Earth each month.
Now look at the diagram below to see what you just acted out from above. This will help you further visualize how the moon is always lit on one side. This never changes. But the position of the moon as it circles the Earth changes so we see the lit side from different angles througout the month.